
Natural Stone & Porcelain Installation Guide
When laying a patio, there are several things you will need to consider to be sure that your project goes smoothly.
Most professional landscapers will have their own tried and tested methods of how to lay paving slabs that have worked for them for several years and as there are many variables to consider, the process may differ slightly depending on who you ask.
Making sure that you get the installation process right is just as important as selecting the slabs, and familiarising yourself with the process ahead of time will help you to avoid any costly mistakes. Whether you’re laying the paving yourself or you have a professional landscaper doing the job for you, we advise having a basic understanding of the process so that you know what to expect.
Before You Start
Communicate thoroughly with any tradespeople you’ll have on-site and ensure that there is plenty of time to accept your delivery and check over the goods before work begins.
You will need to accept delivery at least a few days before you plan to start laying slabs to allow some time to assess any natural variations within the stone and be sure to read our full delivery procedure HERE. Our delivery information will outline all of the key information you will need to be sure that everything goes smoothly on the day.
Checking your slabs for damage in transit is essential and if you discover any damages, please follow our simple damages procedure HERE. Taking the time to do this will help to avoid any delays to the work.

Account For Wastage
Always order an additional 10-15% to account for waste.
When laying a patio, cuts will almost always need to be made to slabs resulting in some wastage. Fitting your slabs around a drain cover, step or to the edge of your available space are just a few examples of why you would need to make cuts. The off-cut sections of your slabs will ultimately come out of the full m² coverage of your order, so always be sure to account for this when placing your order. This will also cover you for any damages during installation, accidental chips or damage and any natural variations that you decide not to use. Find out a little more about Cutting Paving Slabs.
As a natural product, variations in tone and colour will always be present within the stone and being prepared for this ahead of laying the slabs will allow you to pick and choose any that you’d rather not use. You may decide not to use some of the slabs due to personal preference or to keep the colours evenly spread throughout the project. With a natural product, the colours within each crate can never be predetermined and if you have more than one crate of paving, it’s important to mix the slabs from each crate to account for any variations from crate to crate. If you are not carrying out the work yourself, ensure that the person laying the paving is fully aware of any natural variations that you would prefer not to use. Doing this will avoid any slabs being used that you would have preferred to discard and some landscapers will even require that you sign paperwork to agree that you are happy for them to lay natural variations.
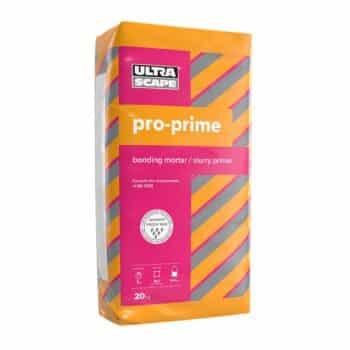
Use A Priming Slurry
It is recommended to use a priming slurry when laying paving slabs. This is also known as a primer or SBR and is applied to the underside of the slabs for a safe and sturdy fix to the base. This will create a barrier between the stone and the mortar to prevent any natural salts and minerals from being drawn up through the base of the slab.
Uneven application of a priming slurry can lead to moisture being drawn up through the base of the stone unevenly. This moisture will appear on the surface in the same uneven fashion which can lead to an unsightly appearance on the finished patio. To avoid this, be sure to apply the wet slurry to the whole underside of each slab.
Dampen or cool the slabs before applying your priming slurry as a warm, dry slab will allow the priming slurry to dry and will stop the primer from performing in the way that it should.
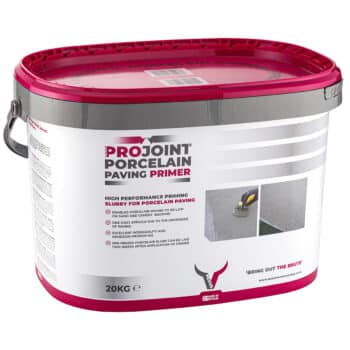
Most tradesmen will have their preference in priming slurries or can even make their own, but it’s always recommended to use a ready-made product. A manufactured product will always offer you much more consistency than a mix that has been made on-site.
We stock Joint It Slurry Primer which does a great job to provide a safe and sturdy fix!
Keep It Clean
Laying a patio can get messy and it’s important to take as much care as possible when laying the slabs to ensure that no staining occurs to the slabs during installation.
Once any substances have had a chance to soak into the stone, the stains left can be very tough or even impossible to remove, so it’s always a good idea to seal the slabs before laying to prevent this.
If you do notice any residue on the slabs when installing, be sure to clean it off ASAP as things such as wet cement will be much tougher to remove once dried. Remember that anything which remains on the surface of a slab can seep into the stone and leave a stain.
Sealing Your Slabs
We always advise sealing your paving, whether it’s Natural Stone or Porcelain. This will help to protect the stone against staining and can be done before or after patio laying.
Natural stone is porous and will absorb liquid from anything left on the surface. Wet leaves, bird droppings and moss can all leave stains and once drawn into the surface of your stone, removing stains can be very tricky. Sealing will also prevent excess moisture from building up within natural stone which will help to prevent frost damage as well as the growth of moss, mould and algae.
Porcelain can also be susceptible to staining from cement and other materials from the laying process and using a porcelain sealer or protected will help with the removal of this.
Always use a high-quality natural stone sealer and be sure to follow the manufacturer’s instructions.

How To Lay Paving Slabs
– Always keep in mind that the specific needs of your project will differ depending on your environment and it is recommended that all the variables of your project are taken into consideration by a professional before your start to laying slabs. Every project is different and a decision will need to be made before the start of the project as to the long-term stability of the ground. Always err on the side of caution and lay a strong base at the outset.
– Paving should be laid at least 150mm below the damp proof course (DPC) of any adjacent building.
– Plan for drainage and calculate a fall of at least 1:60 so that your patio sloped very slightly in one direction. This could be a drop of 1 inch for 60 inches of paving or 1cm for every 60cm. As long as you have the ratio correct, excess rainwater will drain away safely. Be sure that this fall slopes away from any adjacent buildings and that the site is free draining with permeable bedding. Avoid laying paving slabs on any clay-heavy soil. Clay has poor drainage which will allow a build-up of water and will also soften and erode when wet, leaving your slabs prone to shift and break.
– Spot Bedding, Ring Bedding, Dot & Dab Method or Five Dotting Technique are all terms that refer to laying methods where only some parts of the slabs are in contact with the bed. Methods such as these will cause issues with the stability of the slabs, allowing them to become loose and will also cause some serious and irreversible reflective staining to the surface of the slabs. Avoid these methods at all costs. You can find some more in-depth information on ring or spot bedding issues HERE.
– Think about how the paving will be jointed before you start as well as any laying patterns that you’ll be using. You’ll find some great info on laying patterns HERE. When ordering a mixed-size Patio Kit, always be sure to check the exact sizes of the slabs that you will receive within the crate. These are always listed on our product pages and will determine how you will need to go about the jointing process. For some mixed-size patio kits, you may need to balance your joint widths and you can read more about this HERE.
– If you are laying paving from multiple crates, it’s important to mix the slabs from each crate to account for any variations between the two. Dry-laying the slabs beforehand will help you to check that everything is in order before you start.
1. For regular patio and pedestrian use, dig out your sub-base and fill with type 1 or MOT, which is available from any regular builders merchants, before compacting this down to a layer of at least 100mm. If you hit any clay-heavy soil when digging, you will need to dig further to remove any soft pockets and lay a thicker sub-base.
2. Compact the sub-base so that it is level and ensure that severe compaction is achieved. Using a compactor or whacker is recommended and these are widely available to hire. Be sure to get your sub-base right to give your patio the stable support that it will need.
3. On top of this, a full wet bed of mortar is next. This is usually a mix of sharp sand to cement at a ratio of 4:1. The mortar should bind together and should not have a runny consistency. If you don’t have a mechanical mixer, ready-made mortar mixes are available to buy.
4. Spread enough mortar for one slab at a time and lay this at least 50mm thick, spreading the mix a little wider than the size of the slab.
5. Before you lay the slabs, use a priming slurry to coat the whole of the underside. Dampen the back of the slab, then use a brush to apply a 1-2mm thick layer of wet priming slurry right before you lay the paver. Take care not to allow any of the primer to spill over onto the top side of the slab and be sure that the slurry covers the whole of the back of the slab. Keep in mind that each slab has a definite surface and underside and be sure to check that you are laying the stone the right way up.
6. Gently lay the slab onto the mortar bed allowing for the necessary joint width, then tap the surface using a rubber mallet and ensure that there are no hollow spaces left beneath. Any voids beneath the slab will cause issues with stability and if you are unsure, lift the slab back up to and re-lay it to be certain. Use a spirit level to check that the slab is level to the correct fall. Once laid, your paving stones should be very stable and should never rock from side to side or feature any dangerous lips between adjacent slabs.
7. Wipe the slab down to remove any excess mortar and keep a keen eye out for any spillages onto neighbouring slabs so you can wipe away any spills as you go.
8. Place spacers in between the slabs as you go to ensure that your joint widths are consistent. Typically, the recommended joint width is between 8-15mm. Butt-jointing the slabs is not recommended as this can cause damage to the edges of the pavers and won’t allow you any room for the slightest movement or adjustments.
9. Repeat the process until all of your slabs are laid.
10. The final step is to grout or joint the patio and the process for this will depend on the jointing product you choose.


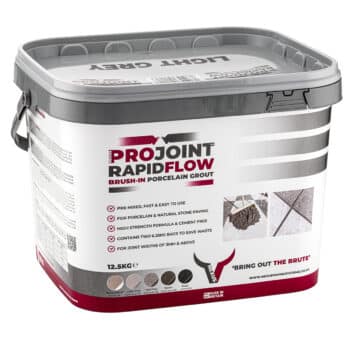
Grouting Your Patio
You will need to fill the gaps between each paver with a jointing compound and there are various options for this, depending on your design preferences and stone type. Grouting your patio will prevent debris from building up in the gaps and prevent any unwanted algae and weeds from growing in the spaces.
The gaps between your slabs should be at least 3mm wide and 25mm deep.
We recommend using Joint-It Simple. All you’ll need to do is add water and mix the solution before use. You will be able to use the Joint-It Product Calculator to work out how much you would need for your project. Other grouting products are available and the process may differ depending on the product.
1. Check that all joints are cleared of any debris or build-up of water so that an even and consistent depth of grout can be applied across the whole area.
2. Dampen the area before applying the compound and pour the grout over the patio before spreading across the surface and into the open joints, keeping the paving wet throughout.
3. Once the joints are full, wet the paving again and leave for 15 minutes.
4. Brush off the excess compound, filling and topping the joints as you go.
Watch the instructional videos on how to use Joint-It Simple here.

Consider Sealing Your Patio
We always advise sealing your stone to help prevent any staining, as well as the growth of moss and algae. Sealing your paving will also help to protect against other general wear or fading.
There is a wide range of sealing products on the market which will provide various results. Some sealants will simply seal and protect, whereas others can be used to enhance the colour and finish of your slabs.
As for when to apply a sealer, some people choose to seal their paving before laying to prevent any staining during the laying process and others prefer to leave their stone unsealed for up to a year, allowing the stone to weather naturally before applying a sealant. This is entirely your choice, and we always advise speaking to a local tradesperson who will be able to assess the many variables within your environment and offer specific advice for your project.
If you plan to seal the stone after laying, ensure that the whole area is completely dry, free from any signs of efflorescence and that the bed has also dried out.
When choosing a sealer, it is best to avoid cheap products to ensure that you get the best results possible and always follow the manufacturers’ instructions.
You can read more in-depth about sealing your patio HERE.

Natural Variations
Natural stone products are not manufactured but are dug from quarries within the Earth and as a result, every slab is entirely unique and will feature its own variations in colour, texture, fossilisation and mineral content. These are all key features of natural stone and cannot be controlled.
Natural variations are not damages or faults with the product but are naturally occurring features of the stone and such variations will always be evident before laying when checked thoroughly. Accounting For Waste is essential as these cannot be pre-determined and will vary within each crate. You will always have the opportunity to inspect each slab before installation to ensure that you don’t use any slabs with variations that don’t meet your preferences or design needs.
The variations you may see within the stone are entirely natural occurrences and it is extremely unlikely that you will find a vast number of variations throughout your entire order unless it is a specific feature of the stone. For example, our Fossil Mint Sandstone will specifically display fossil markings throughout as this is a feature of the product.
Tooling or measurement markings on the underside of the slabs will sometimes be present and will not affect the performance of the product. These are from the process of cutting, calibrating and treating the stone.
We display images of each product as accurately as modern technology will allow and as these images are of natural products in natural lighting, they are subject to many variations. However, we will never display any misleading images and in the event that you are unsure of whether the variations within your stone are naturally occurring, we are always happy to advise.
As the quarrying process is very dusty, please be sure to clean off any thin layers of dust from the slabs before checking. We also advise wetting the stone to account for anything which isn’t obvious whilst the slab is dry. If you are unable to check the slabs before installation, we recommend that you have somebody do this on your behalf as the responsibility of checking the suitability of a product before installation lies with the customer and/or installer.
After Installation
As with any purchase, you may need additional products for the upkeep and maintenance of your stone. We are happy to advise where possible and also recommend seeking professional advice from the manufacturers of such products.
In some cases, you may see changes with the stone after the installation of the product. Anything which appears on the slabs post-installation can only have occurred due to the installation process as the only variable between the receipt of the goods and the effects arising.
Tone & Colour
All images provided on our website show the stone in natural lighting and cannot always account for the full range of variations that you might find within your order.
The variations that you will see in each crate may differ from the images displayed on our website and we do our best to display images of each product as accurately as we can. Please keep in mind that these are customer-submitted images of natural products in natural lighting and cannot account for differences in natural lighting, moisture within the slabs or any products used during or after the patio laying.
A natural product will often have a fine layer of dust from the quarrying process and this can sometimes cause the slabs to look a little lighter in colour at first. Colours will intensify and darken when the slab is wet and once laid, the stone will naturally take in moisture from the mortar bed which will help to bring out more of the natural colours. To test this, you can pour a little water onto the slabs whilst they are still in the crate which will bring out some more of the natural colours.
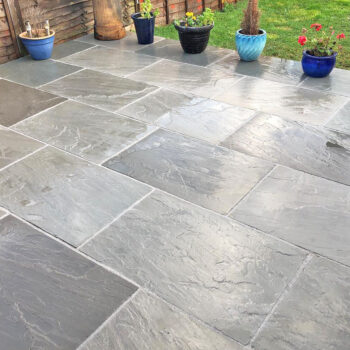
See some examples below of natural variations from slab to slab, as well as the differences between a wet and dry stone in the same two projects.
Veining & Flecks
Variations such as veining and flecks are normal within any natural stone and it is at your discretion whether you choose to use any slabs which feature these variations. These will vary in colour from stone to stone. For example, veining in Granite often appears as white lines, whereas veining on a grey Sandstone will appear as black lines.
The images below show some examples of flecks and veining in Sandstone and Granite.
Oxidation
Natural stone contains iron which can be drawn from within the slabs to the surface and appear as orange or brown marks. This can either happen before or after laying and is due to the moisture in the slabs bringing iron particles to the surface as it evaporates.
Natural oxidation is a normal occurrence for any stone and won’t affect the performance of the slabs. The visible effects of this will naturally dissipate over time.
If you notice this on a slab before laying, we recommend removing the oxidation before using the product or discarding the slab altogether if you would prefer not to use it.
Non-natural oxidation can also appear on your paving from things such as garden furniture and vehicles depositing rust onto the surface of the slabs, as well as any spillages with high acid content. Anything containing acid or ferric sulphate will cause the natural iron particles to be drawn up through the stone and deposited on the surface, leaving an orange-coloured stain.
There are plenty of products available which will help you to remove oxidation marks and if you’d like to speed up the process and we recommend ECOPROTEC Iron Stain Away.
Efflorescence
When the stone drys out it will suck in moisture from the wet mortar beneath. This moisture will make its way up through the stone, carrying particles of cement from the bed, as well as iron and minerals from within the stone, up to the surface. These are later deposited on the surface of the slab as a white, chalky substance.
Efflorescence is not a fault in the stone and is a natural process that can vary in intensity from slab to slab and will also depend on the mineral content of the stone.
If you see efflorescence on your slabs, allow a few weeks for the minerals and salts to work their way out of the stone, sweeping the chalky residue away regularly until it subsides. There are also specialist products available that will aid with the removal of efflorescence such as ECOPROTEC, Cement, Grout & Salt Residue Remover.
This is one of the reasons why it is so important to be sure that your slabs are primed properly with a priming slurry and that the whole of the underside of the slab is coated and in full contact with the bed with no voids. However, efflorescence is nothing to worry about and can easily be removed with some patience.
Picture Framing & Patches
Patches around the edges of the slabs are known as ‘Picture Framing’ and are due to moisture being drawn into the slabs from the jointing compound or mortar base. These patches won’t typically remain permanently.
On a warm and dry day, this picture framing will usually dry out but can appear again in wet or humid conditions as more moisture is drawn back into the slab. The natural porosity of the stone will determine the extent of the patches and will vary from slab to slab.
If the problem doesn’t subside after a few weeks, we recommend the LTP Cement, Grout & Salt Residue Remover. However, it’s important to be patient with this before rushing into treating the slabs.
Uneven application of a sealing product can also cause patches to appear, so it’s important to take your time when applying any sealant to the stone and follow the manufacturer’s instructions carefully.
Fading
Natural stone will gradually fade over time when subjected to natural UV light as well as the slightly acidic rain that we have here in the UK.
The rate at which any fading can occur is down to the amount of rain and sunlight that the stone will see. Other factors such as the use and level of footfall will have an impact on the stone fading.
Sealing your stone will always help to retain the natural colour of the stone and restoration or colour intensifying products are widely available which will help to restore your stone if it has become subject to fading over the years.
Surface Marks & Minor Chips
Minor marks or shallow gauges to the surface or the edges of the slabs can occur when handling or during transportation and these will not affect the performance of the slabs and will dissipate and blend in once the stone begins to weather. If you are unsure, these can always be used in an inconspicuous area.
Cleaning & Maintenance
Maintaining your slabs is essential to keep your paving looking free from any dirt or grime, as well as helping to prevent any damage to the stone.
All types of stone will need some level of maintenance for the best results. This starts with simply sweeping your slabs regularly to remove any debris from the surface before it has a chance to accumulate and leave stains. Leaves, berries and bird droppings can all stain and should be swept from the slabs as soon as possible.
Cleaning Products
If any stains have occurred on your slabs, there is a wide range of cleaning products available to help restore the stone. We have suitable cleaners for our products available HERE.
Always test a cleaning product on an inconspicuous area before applying it to your main patio to be sure that the product will offer you the desired results.
It’s best to avoid using any cheap cleaning products or methods as these can do more harm than good. Never use acid-based cleaners or brick acid on your slabs as these will discolour the paving irreversibly.
We recommend ECOPROTEC products for the best results and the manufacturers will always be able to advise further on the best product for your specific needs.
Marks & Staining
If you are seeing some marks on the surface of your slabs after laying which were not present beforehand, this will be due to something within the laying process or a natural occurrence. We have a handy guide to identifying any marks on your paving HERE.
Pressure Washers
Take care when using a power cleaner or pressure washer as these can damage the surface of the paving and take out the jointing compound from between the slabs. The pressure of the water can also exploit any hairline cracks in the slabs and can even start to damage parts of the stone.
If you do choose to use a pressure washer on your slabs, always be sure to use a low setting and keep the nozzle at least 2 feet away from the surface of the slabs to minimise the potential for damage.
Algae & Moss
To remove moss, algae and lichen from your paving, sweep the affected area with a stiff brush to dislodge as much of the growth as possible. Using warm water can also help to dislodge any stubborn growths and always be sure to clean the area thoroughly once it has been removed.
Avoid any cleaning methods which suggest using bleach as this will damage the stone. For any heavily affected areas, use a specialist product for the best results and consider sealing the stone to help prevent the growths from returning.
Find out more on how to treat your paving in our Cleaning & Sealing Guide.
Further Advice
This information is intended as a guide to the best practices of laying a patio and each project will vary. We always advise speaking with a professional who can assess the specific needs of your project before you start laying paving slabs. For some more in-depth information and specific advice, we recommend PavingExpert.com and ECOPROTEC.

If you have any further questions, we would be happy to help.
Contact us via email at [email protected] or call on 01206 700 599.